Opening a New Door
Opening a New Door
In May of 2018, Door Creek Church broke ground on their new DeForest Campus just minutes north of Madison, Wisconsin. The church was given ten acres by a local developer in what amounts to a suburb of Madison on the edge of urban reach mixed with strong agricultural ties. Originally, a metal building was designed for the church but costs redirected the church’s architect to wood frame construction.
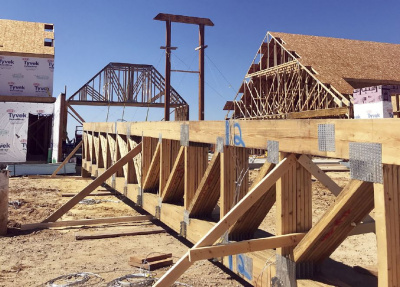
The new church is a 9700 square foot wood-framed place of worship that incorporates 2' deep floor trusses, a myriad of wall panels, 2' oc piggy back trusses, 4' oc parallel chord trusses with SIPs panels above, and a massive 80' ridge beam comprised of multiple multi-ply truss girders. A collaborative team of suppliers and framers was tasked with designing and putting it all together.
The new building has drawn attention to Door Creek Church and has allowed them to increase their congregation from a regular 100 participants to around 200 attendees week to week. “We love serving the community, and with greater visibility, we’re looking forward to connecting with more people. The building has allowed us to get people in the doors that wouldn’t otherwise attend church,” says Ryan Morrison, DeForest campus pastor. “Our first service was Christmas Eve and we had over 900 people, which was amazing. We have nearly doubled our regular attendance due to this amazing space.”
Early on in the project, the general contractor (1848 Construction of Middleton, Wisconsin) held a preconstruction meeting. It was there that the framer, Chris Tatge of Dynamic Construction, and the component manufacturer (CM), John Dees of Automated Products, Inc. (API), learned that they would be working together on the project. Dynamic and API had worked together on numerous projects prior to this, and typically knew when the other was submitting a bid on a particular project. Through past collaboration, Chris and API’s team have developed a good working rapport. “It was pure coincidence that we would be working together on this project,” says Chris of learning about API’s involvement. “I knew there would be few CMs willing to do it, so it was a nice surprise to see API on the project.”
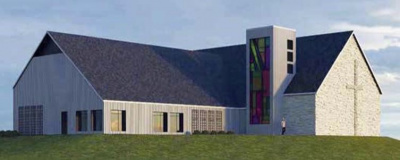
Artist rendering of Door Creek Church, DeForest, WI. The new building features a 250-seat auditorium, multiple rooms for dedicated kid’s space, and large common areas for community and church events.
John agrees it was a “happy coincidence” and, together, API and Dynamic Construction relied on their prior work and a “history of communication” to navigate the complex church project. The wall panels ranged from typical 10ˈ tall closed framed panels to 36ˈ tall balloon-framed closed panels with beam pockets framed with 11-1/4" LSL studs and trimmers. Just coordinating jobsite logistics to determine where to set and stage over 100 wall panels in a manner Chris could easily access them was a significant logistical challenge. “API did a very good job planning ahead and using the available space on the jobsite,” says Chris.
Working together and communicating effectively paid off for the church. This facility gives the DeForest congregation a permanent home to develop community relationships, deepen interpersonal ties, and worship. The space allows the church to grow as the community around it grows. “The building has such a down-to-earth feel but yet is really impressive, yet relatable, kind of how we do church,” says Ryan. In the end, the DeForest Campus of Door Creek Church is a beautiful place of worship. “We love the space, and are proud of the teams that put it all together,” adds Ryan.
Diligent Design
From a component design perspective, the Door Creek Church had a little bit of everything. It had floor trusses, wall panels, and roof trusses, none of which were run-of-the-mill designs found on a normal house or multifamily project. Scott Agen, the project truss designer with Automated Products, Inc. (API) in Marshfield, Wisconsin says “due to the complexity of this project, we did more due diligence up front to know what we were getting into.” Because of that due diligence, Scott and the design team at API caught a number of design discrepancies throughout the design process and worked with the architect and engineer to resolve conflicts between ceiling planes, sort out plumbing drops over floor LVL beams, and even accommodate light switches in tall walls with narrow stud cavities.
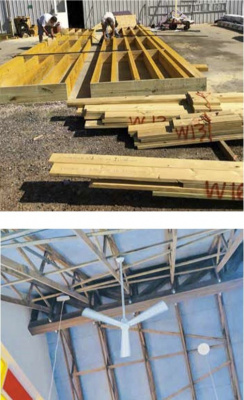
In dealing with ceiling planes over the stage, Scott was able to change a wall height to allow for a higher ceiling height. “Originally the architect saw that area with a vaulted ceiling and the engineer was planning on a flat ceiling with lower wall heights. We were able to change the wall heights and make everyone happy,” says Scott. API’s design team also noted a toilet being located over a 3-ply LVL in the floor system. Pointing that out to the architect prior to construction allowed for a redesign of the bathroom to accommodate the floor structure prior to it being a problem in the field. Scott also points out, “we coordinated studs in a tall wall that were 11-1/4 LVL spaced 6" on center to accommodate a 5-gang light switch.” While a minor detail, having a coordinated effort between the structural team and other trades allows for a superior building that operates seamlessly for the end user.
“We try to do as much as we can to enable our designers to collaborate on projects like these, sitting near, if not directly next to each other to facilitate communication between our wall panel designer and truss designer,” explains John Dees, vice president of sales for API. Working together in this way allows API to close the loop on the component system and offer their customers an integrated system that works. API’s design team further leveraged their internal communication to engage other players in the design and construction process. This project was led by the general contractor but required API to communicate with the engineer, architect, SIPs manufacturer (which were used for roof sheathing), lumberyard, and framer. The feedback loop and RFIs worked brilliantly, as the architect and engineer enhanced their designs after each design meeting and included pertinent information Scott was looking for to accurately load the trusses he designed.
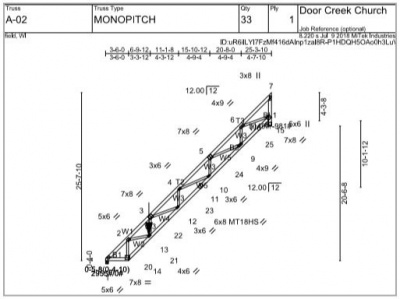
Scott offered creative solutions to many of the design hurdles on the Door Creek Church project. The first was how to deal with a potentially unbalanced load on a beam supporting multiple girders over the main sanctuary. The majority of this area was framed with two 4-ply girders side by side acting as a ridge beam with 25ˈ 3-5/8" parallel chord 12/12 mono trusses 4ˈ oc off each side (Illustration 4). While one end of the 4-ply girders was supported by a truss on one end, the other end was supported by a beam (6 ply 1-3/4"x16" LVL) that also supported a continuation of the ridge beam girders.
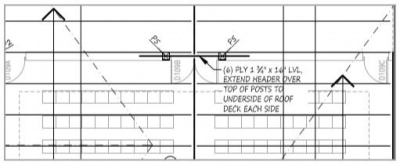
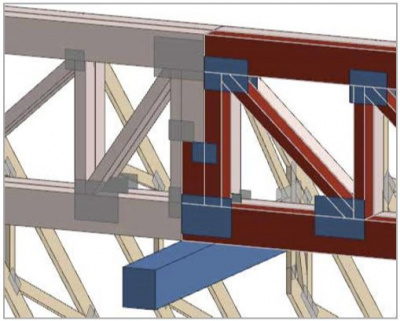
Rather than split the girder over the beam creating the unbalanced loading situation, Scott keyed the girders (similar to two floor trusses sharing the same bearing) allowing full bearing for the primary/longer girders while still supporting the shorter girders (Illustrations 1 & 2).
Illustration 3. Click to enlarge.
Illustration 4. Click to enlarge.
Illustration 5. Click to enlarge.
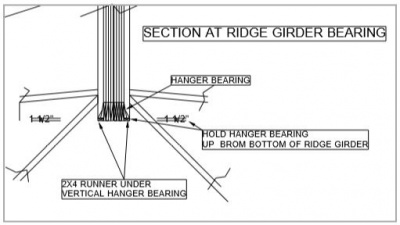
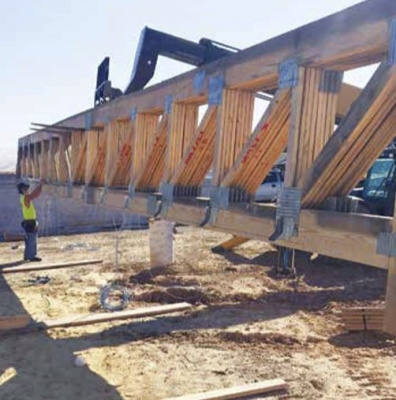
To add to the complexity of the project, the architect designed the project with exposed trusses over the sanctuary. This created appearance implications for Scott as he was designing the roof trusses. “With the bottom chord exposed, we wanted it to look good while balancing bracing requirements.” Therefore, Scott worked through multiple sizes, grades, and species of lumber for the bottom chords of the parallel chord trusses to reduce the amount of bottom chord bracing needed. “We maxed the spacing of the bracing and matched it with the verticals of the parallel chord trusses for appearance purposes,” he adds. Knowing that the parallel chord trusses would be supported by hangers on the girder trusses, Scott worked with the framer to hold up the hangers so a 2x filler piece could be applied under the hangers across the bottom of the side-by-side girders to be more visually appealing from below (Illustration 3).
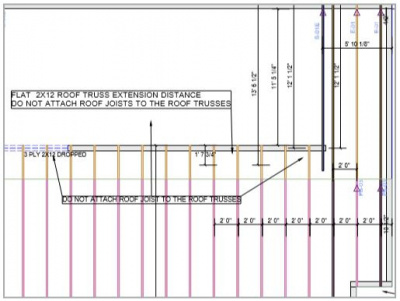
While the roof framing over the sanctuary garners a lot of attention on this project, it isn’t the only part of the project that required creative design. The architect carved out a portion over the offices that was planned to be stick framed to support a couple roof top mechanical units (RTUs). When it was determined that the RTUs required more space than the stick framing allowed, Scott again employed a creative solution and adjusted his truss designs (Illustration 5). “The RTUs needed extra room over the offices, so I increased a section of my bottom chord of the adjacent trusses to match the stick framing and held back the end vertical giving them the additional 21-1/2" they needed,” says Scott. He added some notes to his layout to communicate what was going on with the framer and ensure the incoming 2x12 stick framing wasn’t attached to the roof truss, unintentionally transferring loads to the trusses.
Overall, a project of this scope, with so many unique attributes and numerous players, required detailed internal communication at API as well as externally with specifiers, suppliers, and framers. “Everyone communicating quickly and effectively resulted in a smooth project and we’re really happy with how it turned out,” adds John. “We’ve worked with Chris and his team at Dynamic Construction many times over the years, so communication is a two-way street. We both understand what information the other needs and when they need it. It’s nice to have that.”
Fascinating Framing
When Chris Tatge of Dynamic Construction first learned about the Door Creek Church project he politely declined to provide framing services due to the complexity of the project. “Complex projects like this have a tendency to be difficult from a framing perspective,” says Chris. “There are plenty of safety concerns and they are very time consuming, which adds risk from a business perspective. After being asked a couple more times to submit a bid he really dug into the plans to see if it was something his company could successfully complete. The roof framing consisted of two 56ˈ 11-5/16" 4-ply girders acting as a ridge beam that collectively weighed 7800 pounds supporting 25ˈ 3-5/8" 12/12 parallel chord trusses 4ˈ oc on each side, all on top of 10ˈ walls.
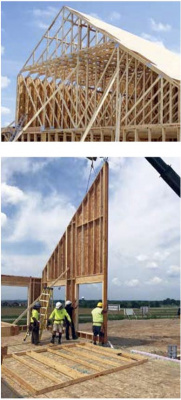
Adding to the complexity of the project, SIPS were specified to be used on top of the trusses over the sanctuary, adding significant detailing time. Chris’ crew would be 20ˈ-37ˈ feet in the air screwing down the panels, caulking, and installing spray foam between the panels.
Once Chris took on the project, he looked for ways his team could perform as much of the work on the ground as possible, increasing the project’s overall safety and efficiency. “The floor under the sanctuary area was polished concrete, so we couldn’t attach any bracing or drill the concrete in that area,” adds Chris. As a solution, Chris welded custom metal box tubing braces that would be long enough and strong enough for temporary bracing outside of the traditional 2x4 lengths he typically uses. In addition to the custom bracing, Chris premeasured and cut a number of steel cable pieces and attached them to the girder on the ground that would act as bracing once the girder was in place. Precutting the cables and attaching them to the girder was easier on the ground and reduced the amount of time the girder would be in the air unbraced while Chris’s team attached the cables to winches already secured and waiting on the ground. In total, over 1500ˈ of cable was used. He plied the girders together and attached the hangers on the ground, simplifying the truss connections and further reducing the amount of time spent in the air installing the trusses. The two girders were strapped together for installation purposes, essentially creating a flat 56ˈ 11-5/16" 8-ply girder that was over 6ˈ tall!
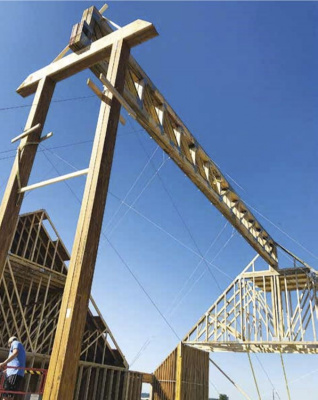
Chris and his team started the installation process by setting 39ˈ 9" 9/12 pitch piggy back base trusses on one end of the building over the lobby. The final base truss was a 4-ply girder that would support one end of the massive ridge beam girder. To stabilize the base trusses, Chris sheathed the flat portion of the flat top trusses with 3/4" OSB and applied 1x4 purlins to fill the 1-1/2" space to support the cap trusses. On the other end the girder was supported by a 6-ply 16" LVL beam between two 11-1/4"x 11-1/4" posts. Once the girder was lifted into position, Chris secured the pre-attached cables to winches at anchor points on the ground for temporary bracing. Just because the girder was on its supports on each end, didn’t mean the girder was straight or plumb. To ensure proper installation, Chris snapped a reference line on the concrete bellow and then used a laser plumb bob to align the bottom of the girder. He would then winch the bottom chord back and forth applying tension on one side and allowing slack on the other side until it was straight and aligned. Chris then did the same along the top chord once the girder was plumb.
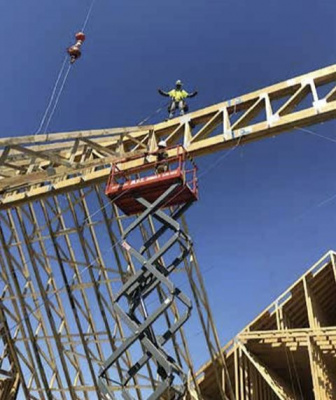
With the ridge beam girder in place, Chris and his team turned their attention toward setting the parallel chord 12/12 pitch trusses. These trusses were 4ˈ oc, a truss spacing Chris’s crew was not as familiar with, which proved to be a learning experience for them. Typically they are used to 2ˈ oc single and multifamily roof trusses, utilizing 25-1/2" installation blocking and bracing more typical of BCSI. For this installation they used 49-1/2" blocking and a more diligent installation method. With one person tied off to the ridge beam and others in scissor lifts below, the crew set ten trusses on one side of the beam, then moved to the other side to install another ten so as not to overload the girder with construction loads. “While I didn’t think that girder was going anywhere, I didn’t want to take a chance and overload it on one side,” adds Chris.
When asked if he would take on the project again knowing what he knows now, Chris says, “One hundred percent absolutely! It was a great challenge and I would be so much more efficient doing it again. This one is definitely a feather in my cap as far as projects go.”

