Implementing SBCA’s Vision for Digital QC & 3rd Party Digital QA
Implementing SBCA’s Vision for Digital QC & 3rd Party Digital QA
Popstar Lady Gaga was once quoted, “I’m just trying to change the world, one sequin at a time.” This idea of incremental change in an attempt to make a great change embodies the work that has been done recently in the development of SBCA’s Digital QC and 3rd Party Digital QA programs. “Advancements on the Digital QC prototype may seem small but each bit of progress makes the program more accurate and easier to use,” says Digital QC program developer Joe Schauer. “We want the product that users receive to be as intuitive as possible to encourage program adoption and use.” That isn’t to say that development progress hasn’t been incredible, so let’s break down what has been happening to make QC easier.
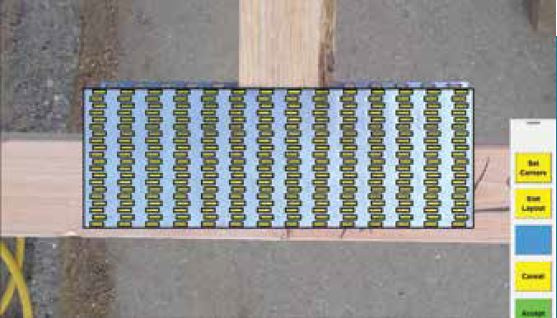 Photo is squared based on plate corners and yellow tooth slots perfectly line up with tooth slots. This shows correct plate size, orientation, and tooth pattern.
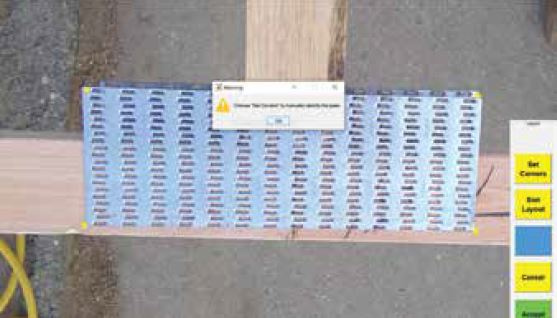
Previously, the auto size function was not able to size the plate due to photo being skewed. Yellow dots are the program’s best guess, which does not properly line up.
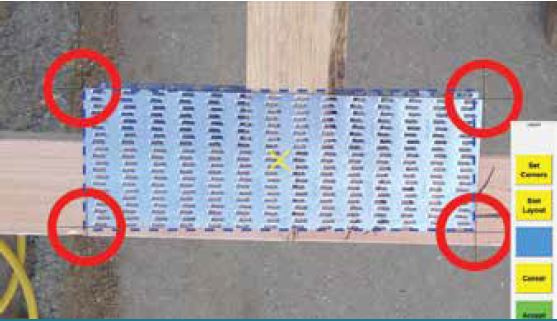
In the latest version, the user can manually position the crosshairs in the red circles to the actual plate corners. Note in the photo the plate skew on the right edge of the plate compared to the blue line.
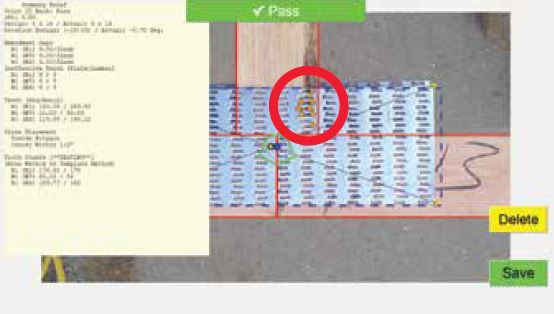
Wane was selected as a defect, shown by brown triangles on the photo, and analysis was run. This plate passed inspection and the inspection can be saved to a report.
Tooth Count
The first major update has been to match the expected plate tooth pattern with the plate on the joint. Up until now tooth counts have been done using plate area over a member. Area is the method used for calculating tooth holding strength in software, so it makes sense that this could be implemented in Digital QC as well. What can happen during QC is that the area does not correctly correspond to the number of teeth on the member. To rectify this issue, the program now shows where the teeth are assumed to be so they can be correctly counted during the joint analysis. This method makes for a more accurate result. The other benefit to displaying the assumed tooth locations on the plate is that users can quickly see whether the plate type and orientation is correct. If a square plate is rotated 90 degrees from design, the inspector will be able to tell right away when teeth don’t line up. The tooth spacing of high-strength plates is also different than regular strength. This can be easily identified because of this feature.
Plate Orientation
The most notable change in the most recent software version is the ability to allow the user to select the corners so the image can square itself. During BCMC 2019 in Columbus, Ohio, SBCA showed the current stage of Digital QC in their booth. This led to some excellent suggestions from show attendees on what they would like to see improved. The biggest takeaway was that it would be useful if users could manually select plate corners if the program did not automatically size the plate correctly the first time. Joe took this suggestion one step further. Not only can users select the corners of the plate for sizing but the program will also translate the photo to make everything square. Previously, a picture needed to be taken so that there was no distortion in the image due to a picture taken at an angle. Now, even photos taken from an angle can be adjusted and used in QC. This makes capturing photos easier and prevents inaccurate results from occurring.
Additional Updates
In addition to those mentioned above, there have been several other updates to the program to improve its functionality. Locating buttons for program operation where users find them most comfortable is one example of continuous improvement. A great deal of input has come from the “alpha sites,” which are using a prototype of the software in their plant in order to provide feedback on usability and make recommendations for updates. Manual lumber defect selection is another area in which constant improvement is the name of the game.
The program will soon be migrated over to another programming language, one of the final steps before the test sites are further expanded. The current language is meant for program exploration; therefore, it is less efficient at running the program than other programming languages. Notable changes that are possible after the migration include increased program processing speed and the ability to use the multi-touch function (i.e., two-finger use) for touch screen devices. Think of the program allowing zooming in and out, or rotating graphics, similar to using Google maps. This is an option that is not available in the current developmental programming language.
The program development is nearing a pivotal stage where more users could soon have access to the program. Software release is scheduled for early 2020. Between now and then, SBCA will keep making the incremental improvements mentioned above as well as potential improvements that have not yet been identified. One thing is for sure, small improvements to the program will make a big difference in the industry’s QC, 3rd party QA, and “measure it to manage it” practices.
Digital QC/QA Vision
Digital QC allows manufacturer’s to more easily collect data, and use this data for continuous improvement of manufacturing processes. Digital QC/QA also provides documented proof of plant quality through all stages of the construction process.
